Table of Contents
In Git, branches play a crucial role in managing and organizing different lines of development within a repository. As projects evolve, some branches may become obsolete or need to be removed to keep the repository clean and manageable. Knowing how to delete git branches both locally and remotely is important for repository maintenance. It will help prevent clutter and ensure that your development environment remains focused on current, active branches.
In this guide, we will walk you through the steps to delete Git branches locally and remotely. But first, it’s important to have an understanding of the differences between a local and remote Git branch.
Understanding Local and Remote Git Branches
The table below offers a clear and concise comparison of the differences between a local and remote branch, making it easy to understand their unique roles.
| Local Branch | Remote Branch |
|---|---|
| Exists only on your local machine. | Exists on the remote repository (e.g., GitHub). |
| Visible only to you unless pushed. | Visible to all collaborators with repository access. |
| Not automatically synced with the remote. | Requires explicit pull or fetch to reflect changes. |
Created locally with git branch or checkout. | Created by pushing a local branch or directly on the remote. |
| For isolated, local development. | For sharing and collaborating with a team. |
| Can track remote branches for easy syncing. | Tracks changes made in the remote repository. |
While you are learning about Git, we highly recommend that as a developer you check out the free web3 and AI development courses on Metaschool.
Deleting a Branch Locally vs. Remotely
Let’s learn about what it means to delete the git branch locally and remotely.
- Deleting a local branch involves removing a branch from your copy of the repository on your local machine. When you delete Git branch locally, you are cleaning up your local workspace by removing branches that are no longer needed or relevant to your current development work. This operation does not affect other users or the central repository; it only removes the branch reference from your own environment.
- Deleting a remote branch means removing a branch from the central repository, which is hosted on a remote server like GitHub, GitLab, or Bitbucket. Deleting a branch remotely affects all collaborators who have access to the central repository, as it removes the branch from the shared environment. This action is typically performed when a branch is no longer needed by the team, such as after a feature has been integrated or a bug fix has been applied.
Local branch deletion is particularly useful for tidying up after merging features or completing tasks, ensuring that your local repository remains uncluttered and manageable. On the other hand, removing a remote branch can help maintain an organized and up-to-date repository for all team members by reducing clutter in the central repository.
Let’s Get Started
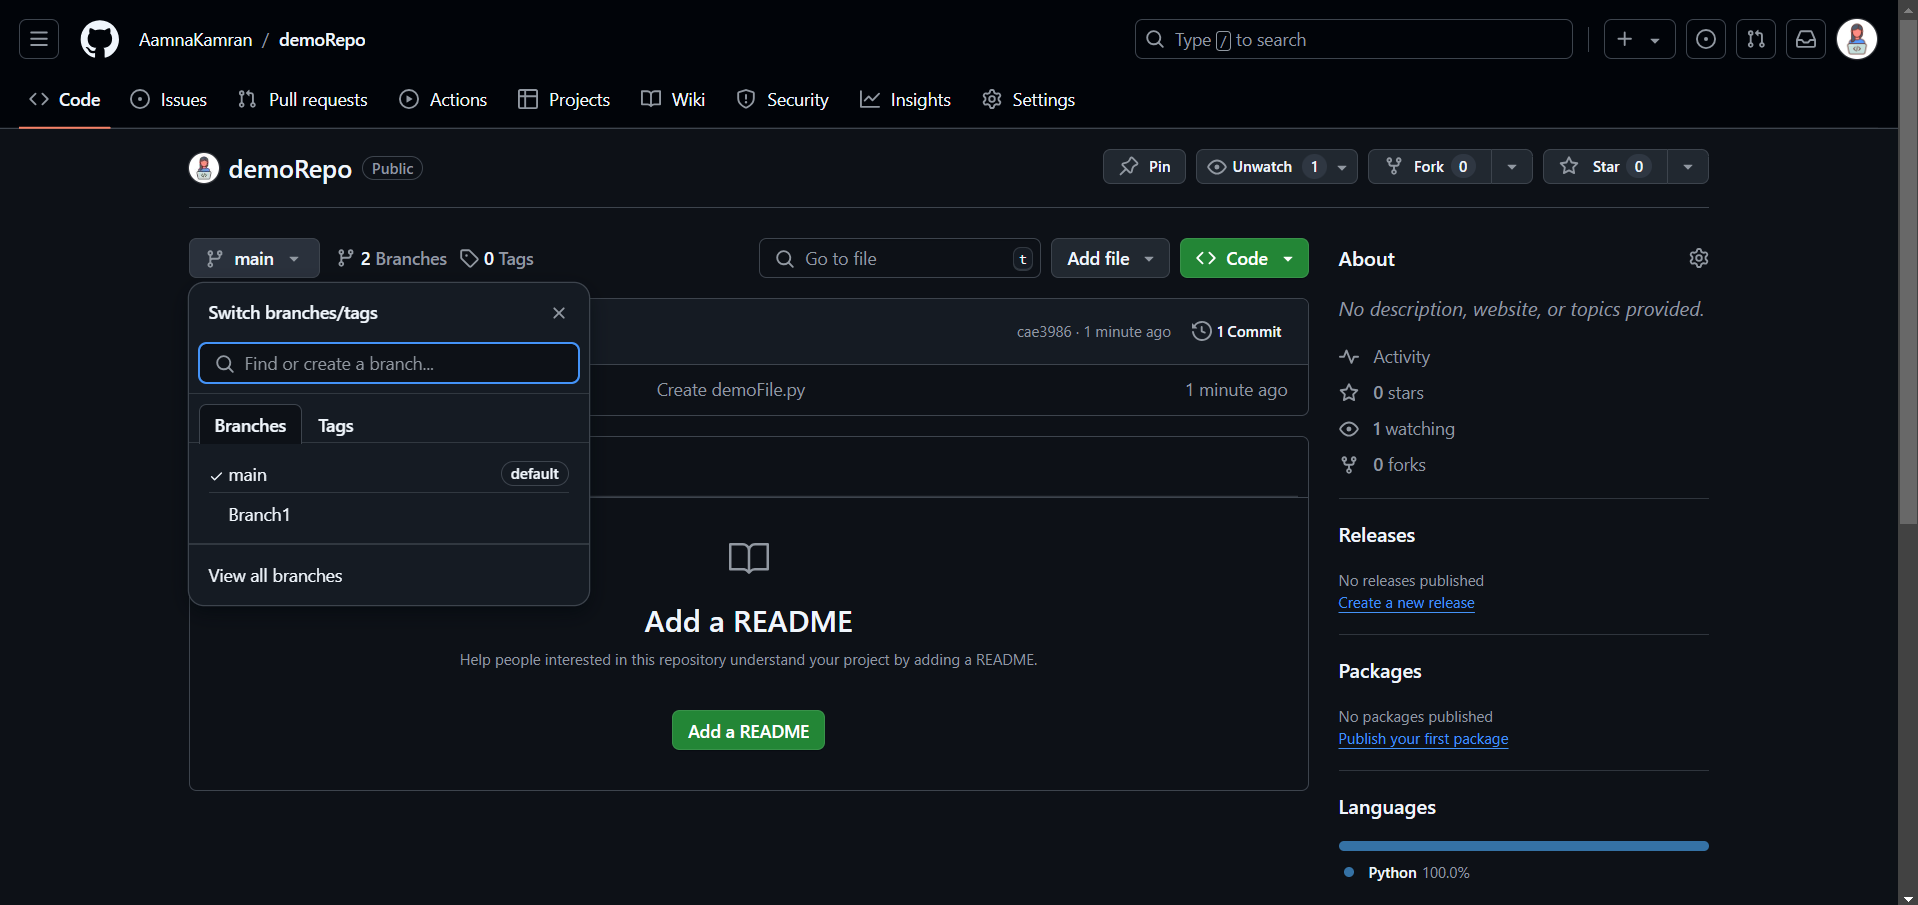
For demonstration purposes, I created a Github repository demoRepo with two branches main and Branch1.
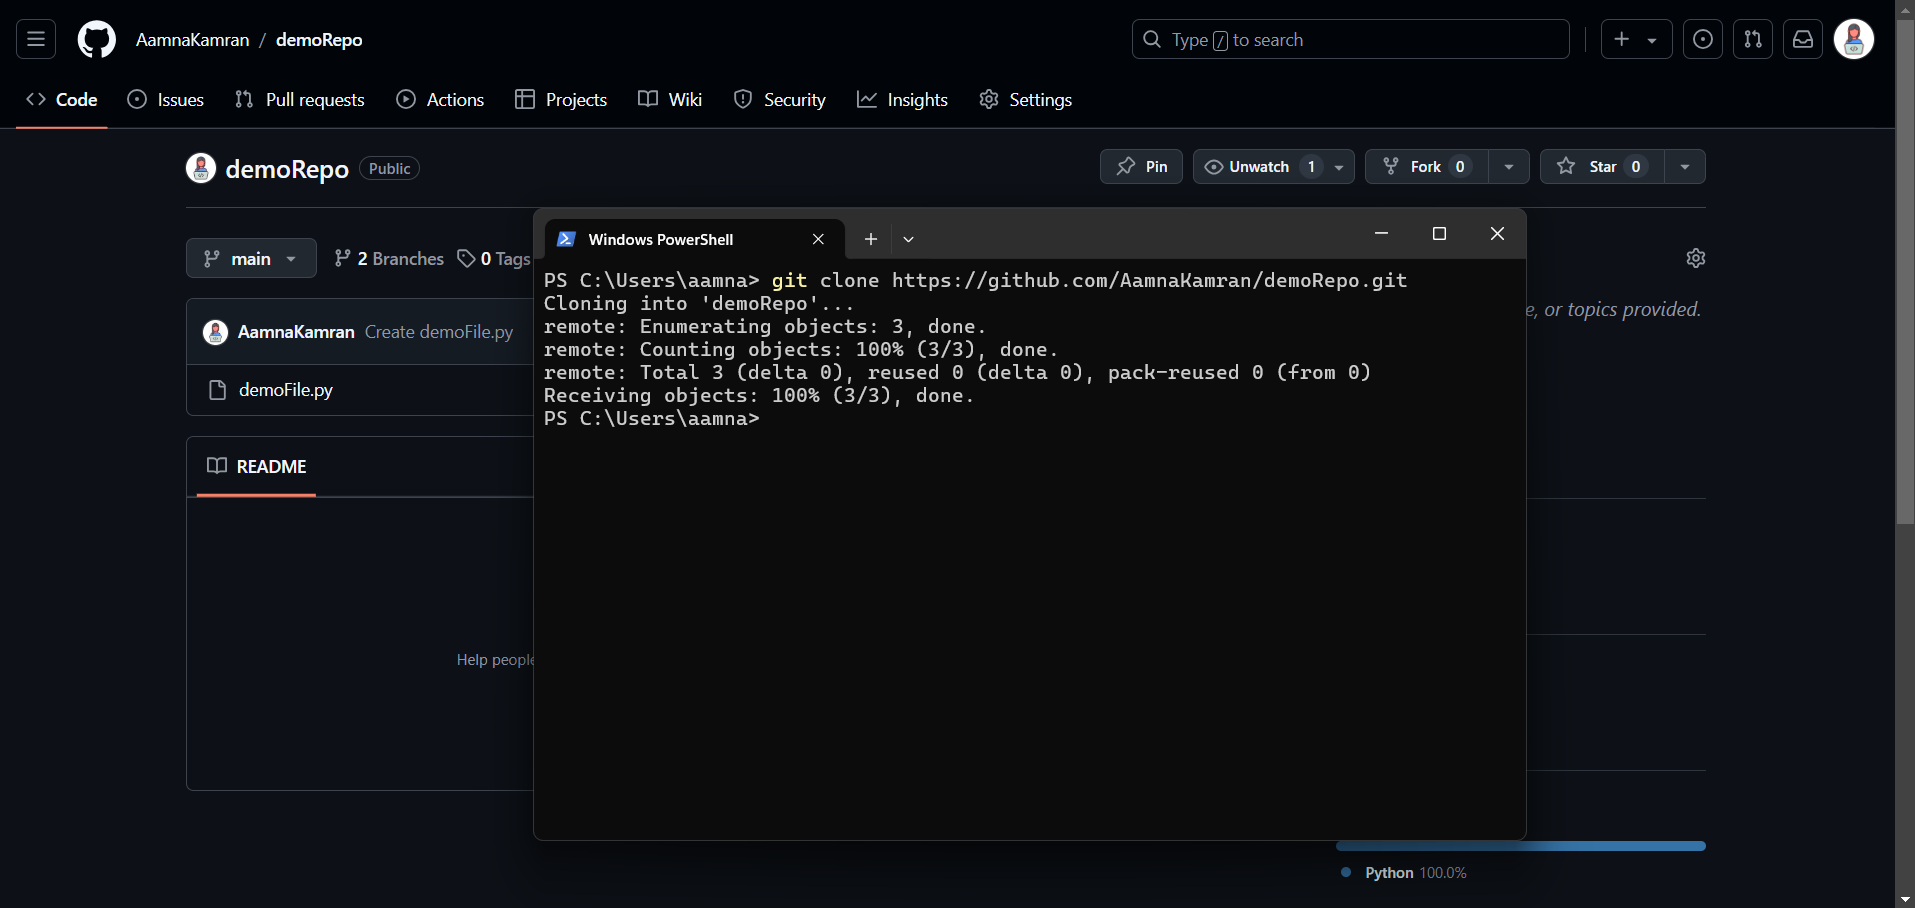
Before you start managing branches in Git, it’s essential to have a local copy of the repository you’re working with. If you haven’t already cloned the repository, you’ll need to do so to access and modify its branches. To clone a repository, use the git clone <repository's URL> (as shown below). This command creates a local copy of the repository on your machine, including all of its branches and history.
Once the repository has successfully cloned, we use the git branch -a to list all the branches associated with this repository. This command includes both local branches (those stored on your local machine) and remote-tracking branches (those that track branches on remote repositories).
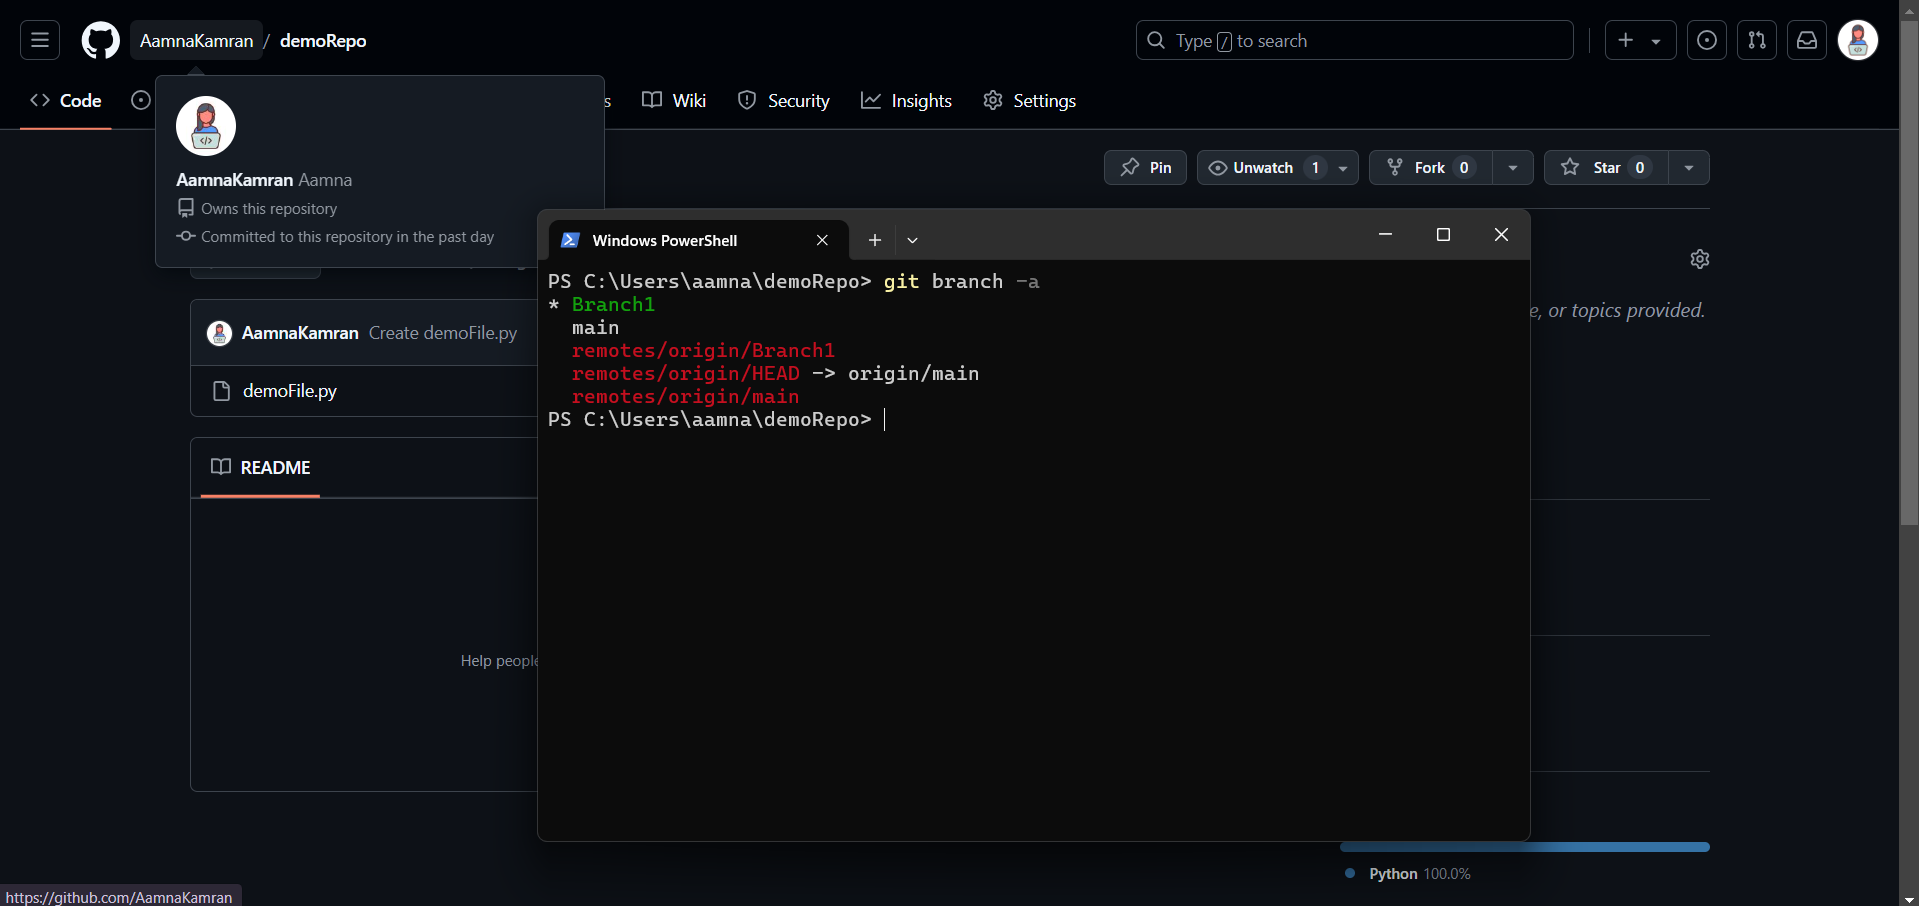
The first two lines of the output show the branches present locally. The rest of the lines represent the branches that exist remotely.
Delete Git Branch: Remotely
Use the git push origin --delete <branch name> command to delete git branch remotely.
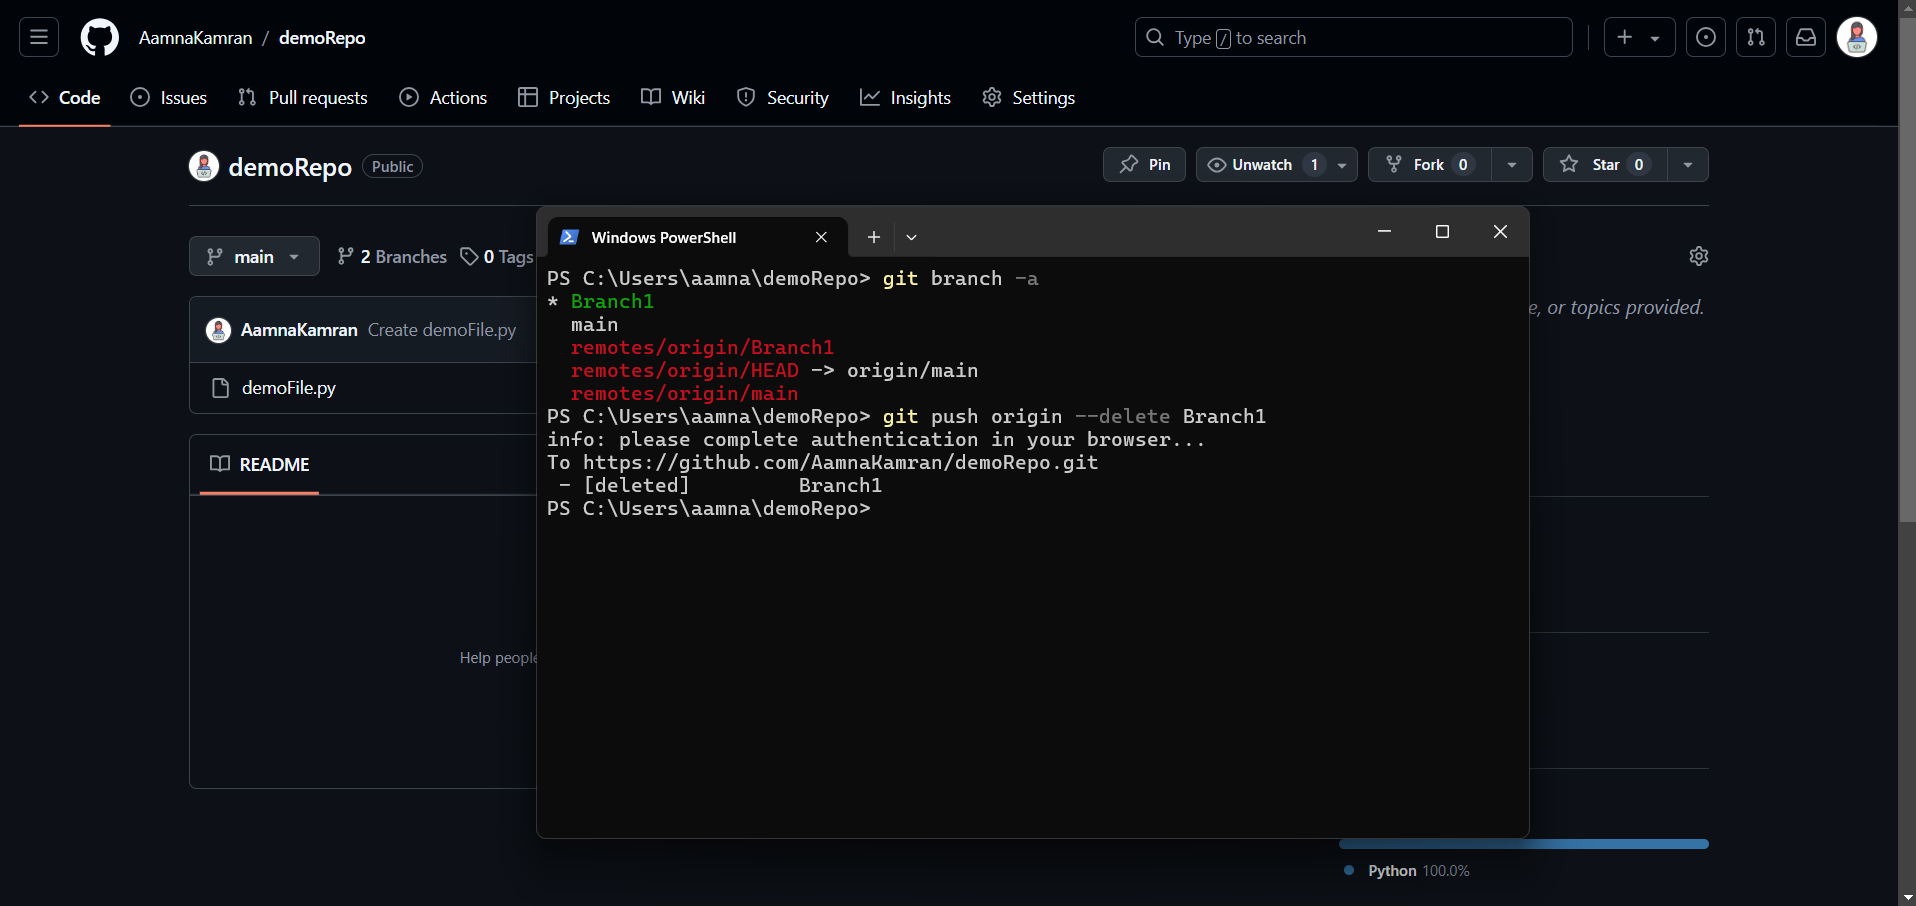
Now if you go back and refresh the repository’s Github page, you will notice that the Branch1 branch is gone – the branch was successfully deleted. You can also use the git branch -a command to see all the existing branches.
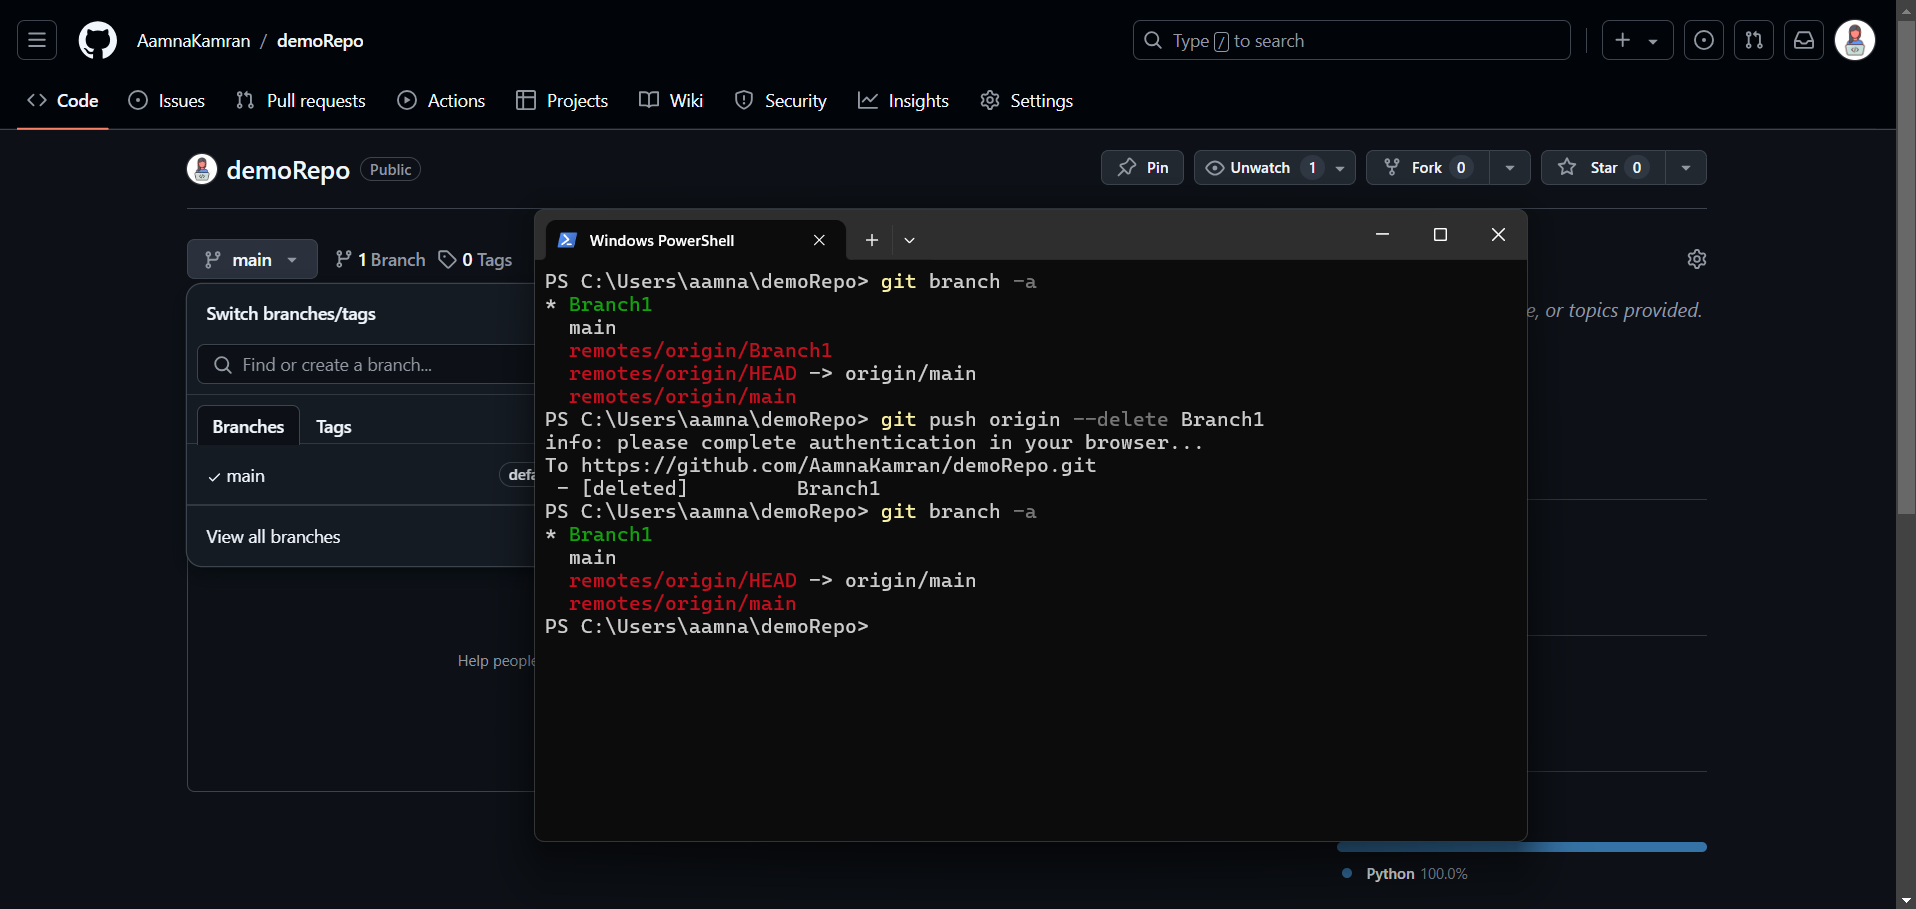
The last two lines of the output show the remote branches, where you will notice Branch1 is not present. But Branch1 still exists locally.
Delete Git Branch: Locally
Use the git branch --delete <branch name> command to delete git branch remotely.
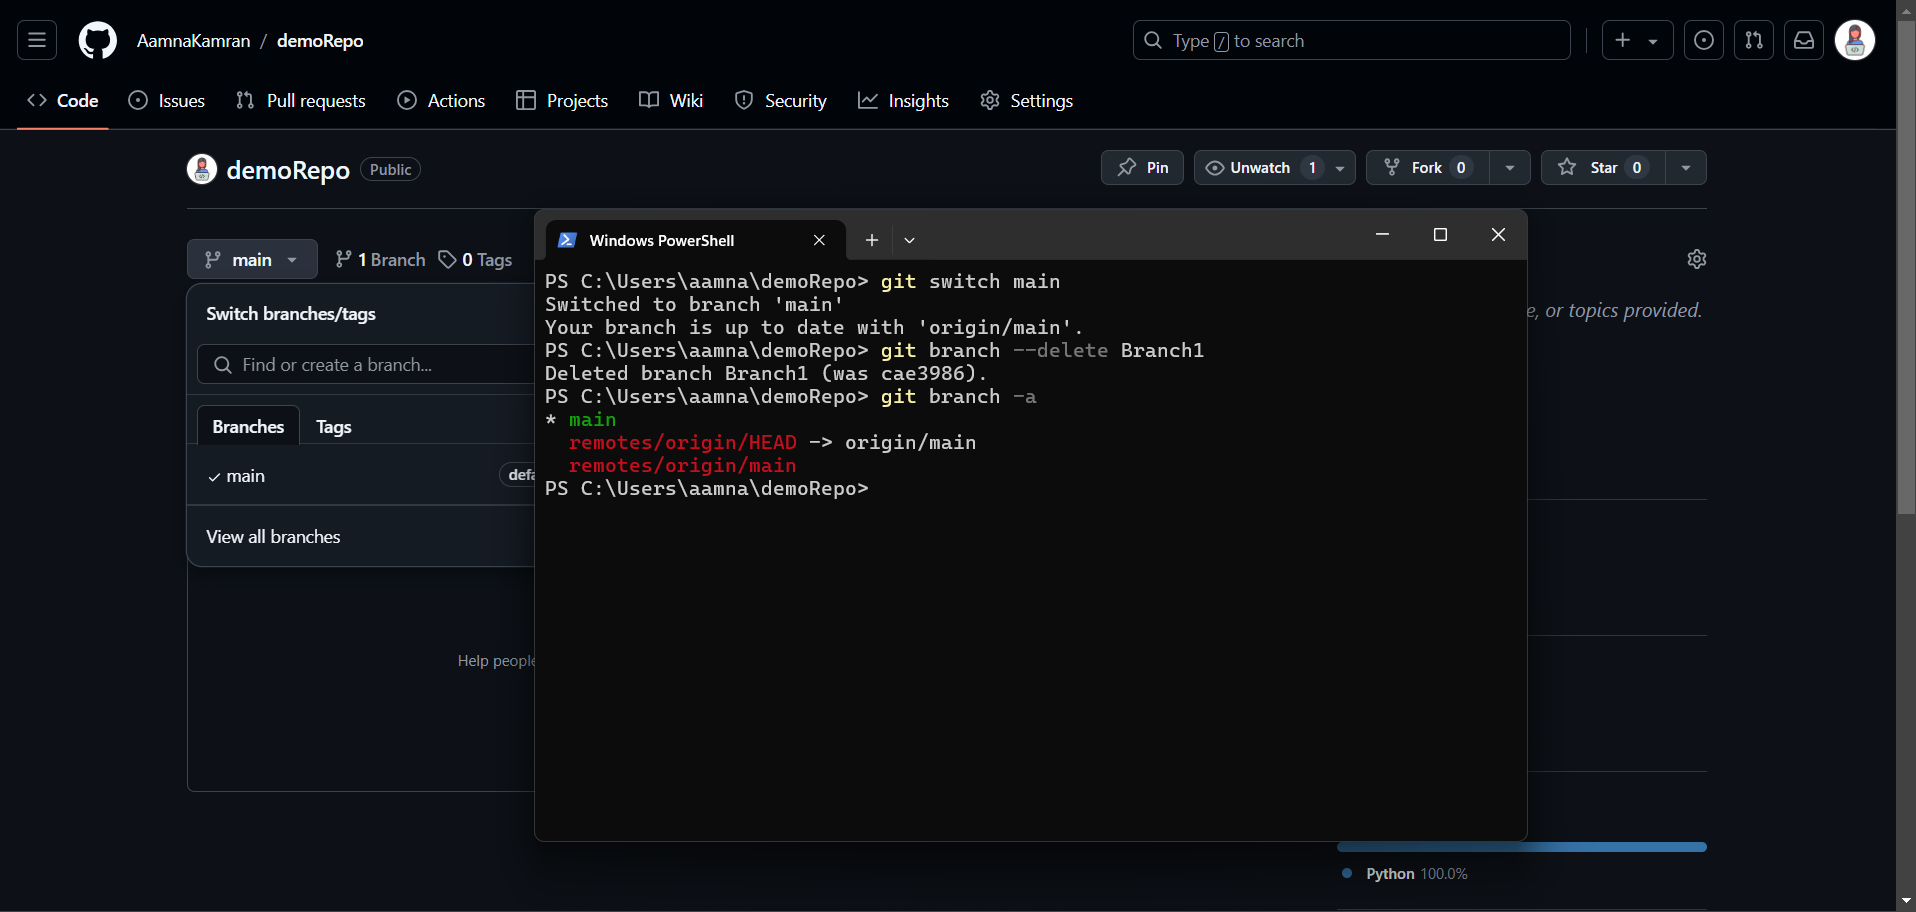
And as you can see the output of git branch -a shows that Branch1 has also been successfully deleted remotely.
Conclusion
Effectively managing Git branches is crucial for maintaining a clean and organized repository. Deleting branches—whether locally or remotely—helps ensure that your project remains focused on active and relevant lines of development. By following the steps outlined in this guide, you can efficiently remove obsolete branches and keep your repository streamlined.
Here is a quick summary of the steps:
- Clone the Repository: Begin by creating a local copy of the repository using
git clone <repository's URL>. This step provides you with access to all branches and the repository’s history.
2. List All Branches: Use git branch -a to view both local and remote-tracking branches. This helps you understand which branches are available and their current status.
3. Perform Deletion Commands:
- To delete git branch remotely, use
git push origin --delete <branch name>. - To delete git branch locally, use
git branch -d <branch name>.
Related Reading:
- How to Remove Untracked Files from Git?
- How to Generate Gits’ Personal Access Token
- How to Become a Software Developer
FAQs
What to do if I accidentally delete a branch?
1. Go to the Github repository page.
2. Click Activity –> Branch deletions.
3. Look for the name of the branch you deleted by mistake.
4. Click the three dots –> Restore Branch.
How to view all branches in a repository?
The command git branch -a lists all branches associated with the repository. This includes both local branches and remote-tracking branches.
Here’s a breakdown of what you see when you run git branch -a:
Local branches: These are listed without any special notation.
Remote-tracking branches: These typically appear in the format remotes/origin/branch-name, where origin is the name of the remote repository and branch-name is the name of the branch on that remote.
Can I delete multiple branches at once in Git?
Yes, you can delete multiple branches at once in Git, but the method varies depending on whether you are dealing with local or remote branches. For local branches, you can specify multiple branch names in a single operation to streamline the process. For remote branches, you may need to use separate commands or scripts to delete several branches at once. Always verify which branches you are removing to avoid accidentally deleting important ones.
