Table of Contents
Building a Chrome extension can be an exciting way to add custom functionality to your browser, automate tasks, and even share useful tools with other users. For developers—especially those new to JavaScript or web development—creating a Chrome extension is a manageable yet impactful project to start with. Thanks to tools like ChatGPT, you don’t have to face the challenges alone. By generating code snippets, offering explanations, and guiding you through complex features, ChatGPT acts as a coding companion, making it easier to bring your extension ideas to life. In this guide, we’ll walk you through the steps to create a JavaScript Chrome extension using ChatGPT.
What is a Chrome Extension?
A Chrome extension is a compact software program that enhances and customizes the functionality of the Chrome browser. These extensions are designed to improve user experience by automating tasks, modifying browser behaviors, and providing specialized tools that streamline workflows and boost productivity. Chrome extensions can operate on a particular webpage or apply their functionality browser-wide, depending on the user’s needs.
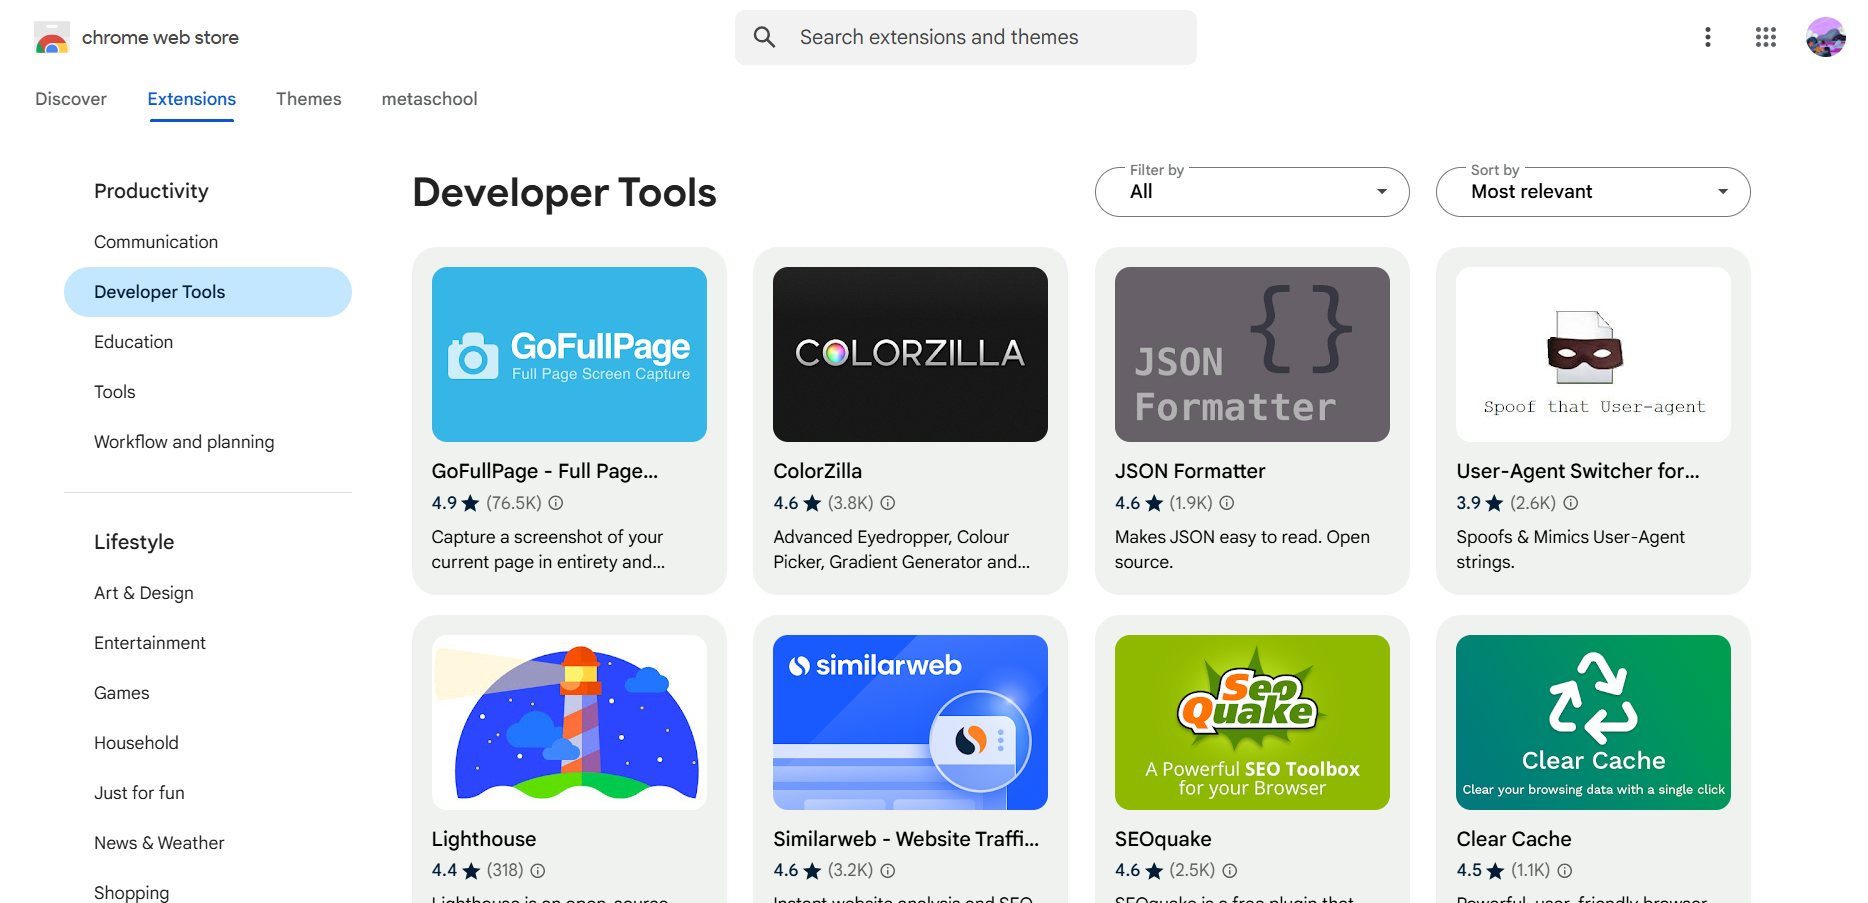
Chrome extensions can be built using HTML, JavaScript, and CSS. With an ever-expanding library of available extensions, users can easily tailor their browsing environment to meet specific needs.
Why Use ChatGPT for Chrome Extension Development?
AI tools like ChatGPT are transforming the development process, making it more accessible and efficient for both beginners and experienced developers. Here’s why ChatGPT is an ideal companion for Chrome extension development:
- Ideas for Advanced Features: ChatGPT can suggest ways to enhance your extension with additional features, like integrating APIs, adding user preferences, or implementing background scripts, encouraging growth and creativity in your project.
- Code Generation and Snippets: ChatGPT can quickly generate code snippets, helping you create essential parts of your extension, like JavaScript functions, HTML elements, or CSS styling, without starting from scratch. This speeds up development and provides a reliable base for customization.
- Step-by-Step Guidance: If you’re new to coding, ChatGPT can guide you through each step of the development process, from setting up files and folders to writing and debugging code. This makes it easier to learn the fundamentals and follow best practices.
- Troubleshooting and Debugging Support: Encountering errors or issues is common, it’s actually part of the process (as any developer with tell you *sigh*). ChatGPT can help identify errors, offer solutions, and explain why a piece of code may not be functioning as expected, saving you time and frustration.

AI tools like ChatGPT are revolutionizing development by providing quick code snippets, troubleshooting support, and guidance. ChatGPT’s versatility makes it particularly beneficial for beginners creating Chrome extensions, as it offers an efficient way to learn the fundamentals, understand coding logic, and overcome common coding challenges.
Why JavaScript is a Good Choice for Building a Chrome Extension
JavaScript is the primary language for creating Chrome extensions, and for good reason. Here are a few key advantages that make JavaScript an ideal choice for extension development:
- Native Browser Support: JavaScript is the core programming language of the web and is fully supported in all major browsers, including Chrome. This compatibility makes it easy to integrate JavaScript code directly into your extension, ensuring smooth interactions with the Chrome browser and access to its APIs.
- Easy Interaction with HTML and CSS: Since Chrome extensions often include interactive popups or embedded content, JavaScript’s ability to work seamlessly with HTML and CSS is invaluable. This allows developers to build responsive user interfaces, handle button clicks, and dynamically update the UI, all within the extension.
- Extensive API Support: Chrome provides a powerful set of APIs specifically for extensions, allowing JavaScript code to access features like tab management, storage, and content scripts. This flexibility makes it easy to build a wide range of functionalities, from simple tools to complex utilities, all using JavaScript.
- Growing Community and Resources: JavaScript is one of the most widely used programming languages, so there’s a vast amount of community support, resources, and documentation available. This is especially helpful for beginners building their first extension, as there are many tutorials, forums, and libraries that can simplify the process.
- Asynchronous Capabilities: Extensions often need to fetch data from APIs, handle background tasks, or perform actions in response to user inputs. JavaScript’s asynchronous capabilities—thanks to features like Promises and async/await—make it well-suited for these real-time interactions, ensuring a responsive user experience within the extension.
By leveraging JavaScript’s strengths, you can build a Chrome extension that’s not only functional but also responsive and reliable. As you progress, you can even add more advanced features, knowing that JavaScript provides the versatility needed to support your extension’s growth.

Now that we have a solid understanding of the basics, it’s time to dive into the development process and start building our JavaScript Chrome extension step by step.
Step 0: Define the Purpose of Your Chrome Extension
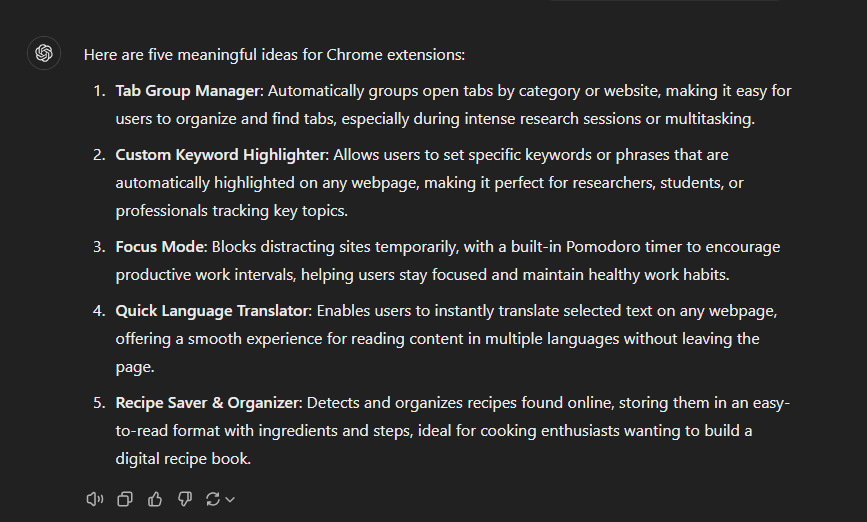
Before diving into development, it’s essential to clarify the purpose of your extension. Understand what specific functionality or problem you want it to address. ChatGPT can be a valuable resource here—use it to brainstorm ideas, refine your concept, and even explore potential use cases to ensure your extension serves a meaningful purpose.
I asked ChatGPT to suggest some ideas, here is how it went:
Today, we will create a JavaScript Chrome Extension that displays inspirational quotes whenever you click a button. This extension will fetch quotes from an API and present them in a popup, adding a bit of motivation or positivity each time you open it. We will go over building the core functionality, enhancing the appearance with CSS, and adding the necessary configuration files to bring your Chrome Extension to life.
Step 1: Setting Up Your Development Environment
To streamline the development process, start by downloading and installing a text editor or IDE of your choice, such as Visual Studio Code or Atom. Also, make sure that your Google Chrome browser is up to date to avoid compatibility issues during testing.
Creating Your Project Folder
- Set up a folder for your project.
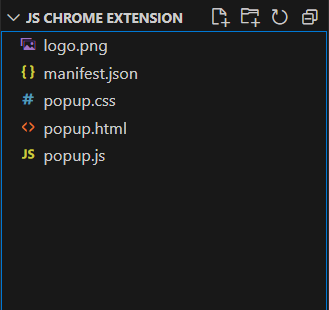
- Create the following files:
manifest.json
popup.html
popup.js
(optional) popup.css - (Optional) Save the icon you want to use as your Chrome extension logo in the directory as well.
Here is what the directory structure looks like:
Step 2: Understanding the Manifest File
The manifest file is a JSON file manifest.json that defines essential information (configurations and capabilities) about your Chrome extension, such as its name, version, permissions, and basic functionality. It serves as the blueprint for your extension.
Copy the following code into your manifest.json file:
{
    "manifest_version": 3,
    "name": "JS Chrome Extension",
    "version": "1.0",
    "description": "A personalized JavaScript Chrome extension developed using ChatGPT.",
    "action": {
      "default_popup": "popup.html",
      "default_icon": "logo.png"
    },
    "permissions": ["activeTab"]
}
Explanation:
- manifest_version specifies the version of the Chrome Extension Manifest being used. In this case,
"manifest_version": 3indicates that the extension uses Manifest V3, which includes updates in security and performance compared to previous versions. - name specifies the name of the extension, “JS Chrome Extension.” This name is shown in the Chrome Web Store and in the Chrome extension settings.
- version defines the current version of the extension. In this case, it’s set to
"1.0", typically indicating the initial release. This version number should be updated with each new release of the extension. - description gives a brief overview of the extension’s purpose. Here, it states that this is a “personalized JavaScript Chrome extension developed using ChatGPT.” This text also appears in the Chrome Web Store and in extension settings.
- action specifies settings related to the extension’s action icon, which appears in the Chrome toolbar.
- default_popup: Specifies the HTML file (
popup.html) that appears as a popup when the extension’s action icon is clicked. This popup is the primary interface through which users interact with the extension. - default_icon: Indicates the image file (
logo.png) that Chrome should use as the icon for the extension. This image is shown in the browser toolbar to represent the extension.
- default_popup: Specifies the HTML file (
- permissions array defines the permissions the extension requires to function. Here,
"activeTab"grants the extension access to the currently active tab, allowing it to interact with or modify its content if needed.
Step 3: Building the Core Functionality
To make building the core functionality of your extension easier, use ChatGPT to help you quickly generate code based on your specific requirements.
Start by explaining what you want your Chrome extension to do in clear, simple terms. Describe the main function, the type of API requests or interactions needed, and any specific UI elements, such as buttons or text fields, that you want. For instance, you might say, “I want an extension that fetches motivational quotes from an API and displays them in a popup when a button is clicked.”
Once you’ve clarified your requirements, ask ChatGPT to help you generate specific parts of the code. Break down your questions to get targeted responses. For example, ask ChatGPT, “Can you provide a JavaScript function that fetches a quote from an API and displays it in a popup?”
Creating a Popup for User Interaction
Copy the following code in your popup.html file:
<!DOCTYPE html>
<html lang="en">
<head>
    <meta charset="UTF-8">
    <meta name="viewport" content="width=device-width, initial-scale=1.0">
    <title>Quote Extension</title>
    <link rel="stylesheet" href="popup.css">
</head>
<body>
    <div class="popup-container">
        <button id="countWordsBtn" class="btn-motivate">Motivate Me!</button>
        <div id="quoteDisplay" class="quote-text">Hello!</div>
    </div>
    <script src="popup.js"></script>
</body>
</html>
Explanation
This HTML file sets up the basic popup interface for the Chrome extension, containing a motivational button and a text display area. When users click “Motivate Me!”, a JavaScript function in popup.js will fetch and display a new motivational quote inside the quoteDisplay element. The layout and style are further customized using popup.css (more on the styling later).
Adding JavaScript Functionality
Copy the following code in your popup.js file:
document.getElementById('countWordsBtn').addEventListener('click', function() {
    // Fetch a quote when the button is clicked and display it
    fetchQuote();
});

// Function to fetch a quote from the API
function fetchQuote() {
    // Define the category you want to fetch
    const category = 'happiness';  // You can change this to any category you want
    const apiUrl = `https://api.api-ninjas.com/v1/quotes?category=${category}`;

    fetch(apiUrl, {
        method: 'GET',
        headers: {
            'X-Api-Key': 'YOUR-API-KEY'  // Replace with your actual API key
        }
    })
    .then(response => response.json())
    .then(data => {
        if (data && data.length > 0) {
            const quote = data[0].quote;  // Access the quote field
            const author = data[0].author;  // Access the author field
            document.getElementById('quoteDisplay').textContent = `"${quote}" - ${author}`;
        } else {
            document.getElementById('quoteDisplay').textContent = 'No quote found.';
        }
    })
    .catch(error => {
        document.getElementById('quoteDisplay').textContent = 'Error fetching quote.';
        console.error('Error fetching quote:', error);
    });
}
Explanation
This JavaScript code enables an interactive experience in a Chrome extension popup by fetching and displaying motivational quotes from an API. When the button with the ID countWordsBtn is clicked, an event listener triggers the fetchQuote function. This function constructs an API request to fetch a quote from the “happiness” category. The request URL includes the category parameter, which can be customized, and sends a GET request to the API with an API key in the headers.
Upon receiving a response, the function converts it to JSON. If the API returns data, the script extracts the quote and author properties from the first item in the data array, then displays the quote and author in the HTML element with the ID quoteDisplay. If no quote is found, it displays a default message indicating that no quote was returned. If an error occurs during the request (e.g., network issues or incorrect API setup), the catch block captures the error, displays an error message in the quoteDisplay element, and logs the error to the console for debugging. This structure makes the code user-friendly, providing feedback to the user in case of success, failure, or an empty result.
For the purpose of this extension, I have used this Quotes API. In the code above, replace the placeholder
'YOUR-API-KEY'with your actual API key from API Ninjas. To get your key, create an account on their platform, and then visit your API Ninjas profile to find and copy your key.
Step 4: Testing Your Chrome Extension
- Load the Extension: Open Chrome and go to
chrome://extensions/. - Enable Developer Mode: In the top-right corner, toggle “Developer mode” on.
- Load Unpacked: Click “Load unpacked” and select your project folder.
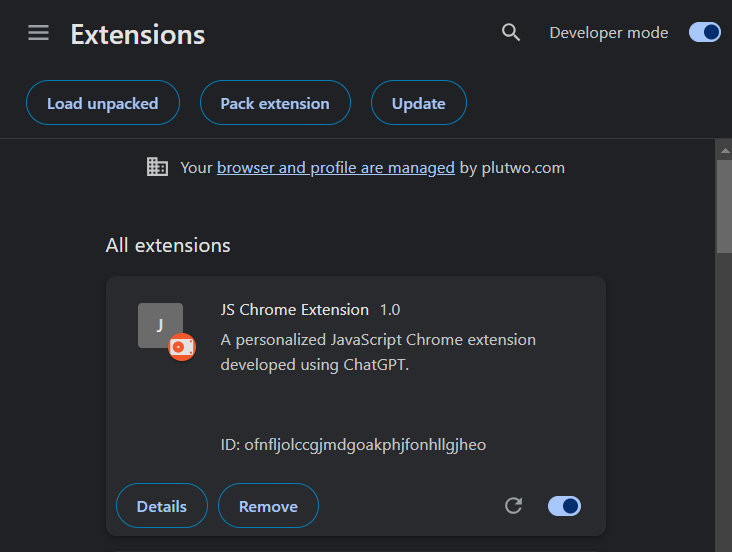
If there are any errors in the code you will see a red button Errors next to the Remove button. Let’s see what we can do when we encounter any erros.
Use Chrome DevTools to troubleshoot. Right-click on your extension’s popup and select “Inspect” to open DevTools. Check the console for errors, and verify file paths in manifest.json, and ensure elements are referenced correctly in popup.js. Copy the error and paste it into ChatGPT and ask for suggestions or modifications.
Step 5: Enhance the Look of Your Extension
To style the popup effectively, ask ChatGPT for CSS that centers the button and text in a clean, readable font. For instance, you might say, “Please help me style a popup with a centered button and text in a readable font, with a soft background color and rounded button design for a professional look.” This approach prompts ChatGPT to generate concise, tailored CSS.
Copy the following code in your custom.css file to add some styling to the popup interface:
/* popup.css */
body {
    font-family: Arial, sans-serif;
    margin: 0;
    padding: 0;
    background-color: #f4f4f9;
    width: 350px;  /* Increased width */
    height: 180px;  /* Reduced height */
    box-sizing: border-box;
}

.popup-container {
    display: flex;
    flex-direction: column;
    justify-content: center;
    align-items: center;
    padding: 20px;
    height: 100%;
    text-align: center;
}

.btn-motivate {
    background-color: #4CAF50;
    color: white;
    border: none;
    padding: 12px 20px;
    text-align: center;
    font-size: 16px;
    cursor: pointer;
    border-radius: 5px;
    width: 100%; /* Button stretches across the full width */
    transition: background-color 0.3s ease;
}

.btn-motivate:hover {
    background-color: #45a049;
}

.quote-text {
    margin-top: 20px;
    font-size: 18px;
    color: #333;
    line-height: 1.4;
    word-wrap: break-word;
    min-height: 60px;  /* To ensure the text has space even if it's long */
    text-align: center;
}
Now reload your extension from the chrome://extensions/ page and click on the extension icon.
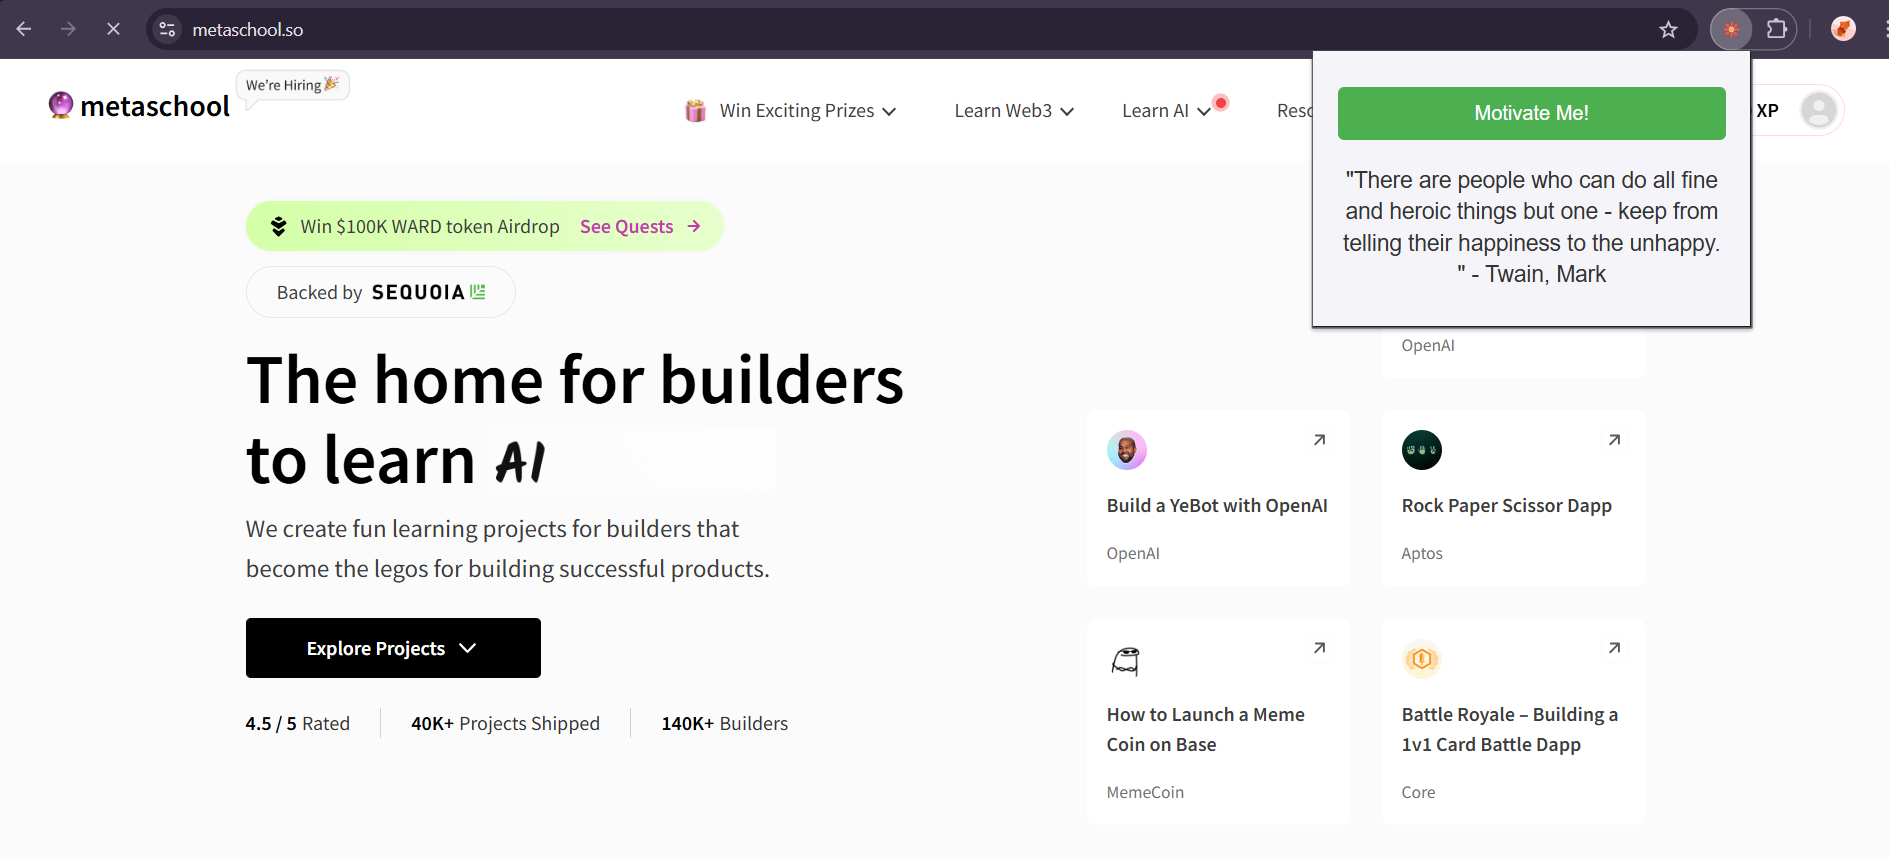
This is what our extension looks like. Pretty neat, huh?
Step 6: Publishing Your Chrome Extension
Before publishing, test your extension thoroughly. Write a descriptive listing with icons and screenshots.
Publishing on the Chrome Web Store
- Go to the Developer Dashboard: Access the Chrome Web Store Developer Dashboard.
- Create a New Item: Click “Publish in Chrome Web Store” and follow the prompts to upload your extension as a ZIP file.
After submitting, Google will review your extension. Once approved, it will be available for public download.
Conclusion
This guide provides a comprehensive foundation for building a simple yet functional Chrome extension with the help of ChatGPT. By following each step, you’ll gain hands-on experience in Chrome extension development, from setting up your project to adding personalized features and preparing for publishing. With ChatGPT’s assistance, you can efficiently troubleshoot, explore advanced functionalities, and continuously improve your extension. Embrace this experience as a stepping stone toward creating even more sophisticated tools that can enrich user interactions and streamline browsing tasks.
Related Reading
- How to Become a Software Developer – 6 Step Guide
- Object Oriented Programming – A Comprehensive Guide
- 20 Most Popular Programming Languages for Developers
- How to easily test Solidity require in JavaScript
- How Companies like Amazon and Google are Making Use of Blockchain
FAQs
Can I build complex Chrome extensions using ChatGPT, or is it only suitable for basic features?
Yes, ChatGPT can assist with both simple and more advanced features. While it’s excellent for getting started with basics, ChatGPT can also help with more complex functionalities, such as API integration, data storage, and background scripts. You can prompt ChatGPT for specific coding solutions, debugging help, and ideas on extending your extension’s capabilities.
How can I test my Chrome extension effectively before publishing it?
To test your extension, load it in Chrome by enabling “Developer mode” and selecting “Load unpacked” to add your project folder. You can then use Chrome DevTools to inspect and debug your extension’s popup or background processes. Be sure to check for errors, verify permissions in manifest.json, and test all interactive features to ensure smooth functionality.
Do I need prior coding experience to build a Chrome extension with ChatGPT’s help?
While prior coding experience is helpful, it’s not required. ChatGPT can guide beginners through each step, from setting up files to writing basic JavaScript code. Starting with simpler features will help you understand the basics, and as you progress, ChatGPT can assist with more complex functionalities, making it a great learning tool for new developers.
