Table of Contents
Customer feedback is critical in every business, whether you’re running an online store or a physical cafe. Feedback sets a direction for you to align your future progress. It’s like a goldmine that lets you understand their likes, dislikes, and areas of improvement. But when you’re dealing with hundreds of comments, reviews, and feedback, it becomes impossible to sort them manually and draw some conclusions from them. This is where a need to build a sentiment analysis tool came into existence. But what exactly is this tool?

Building a sentiment analysis tool is a perfect solution to the never-ending task of manually sorting hundreds of comments and trying the understand the sentiment of your users. Imagine you have a tool that analyzes all of your comments, understands the sentiment of each comment, and draws some conclusions from it. Well, it’s not a dream, it’s a reality that we’re going to build by the end of this article. Whether you’re trying to roll out a new feature, launch a new product, or just want to monitor your social media, sentiment analysis is a perfect choice to get some insight. You might be thinking “But how does it know about the sentiment of the user?”.

Let’s dive into it and build it step by step!
What is sentiment analysis?
Sentiment analysis is a technique used to determine the emotional tone of a given text—whether it’s negative, positive or it’s neutral. Imagine you’re a product owner and your team just launched a new feature, you want to understand how the users feel about this feature. You can use sentiment analysis to understand the feedback instead of manually going through hundreds of comments.
Now, let’s start building a sentiment analysis tool that is going to make your life much simpler!
Setting up the development environment
Before diving into setting up a development environment let’s discuss some tools and technologies we are going to use in this journey:
- HTML/CSS/JS: We’re going to use these tools to develop the front-end side of our application and create the user interface(UI).
- OpenAI: It will serve as a brain of our tool. We’ll use its API to analyze the sentiment of provided comments.
- Flask and Python: We’ll use these to set up the backend of our tool.
- Chart.js: To visualize our sentiment analysis results visually.
We have decided to use Python programming language, due to its simplicity for handling APIs.
Install Python
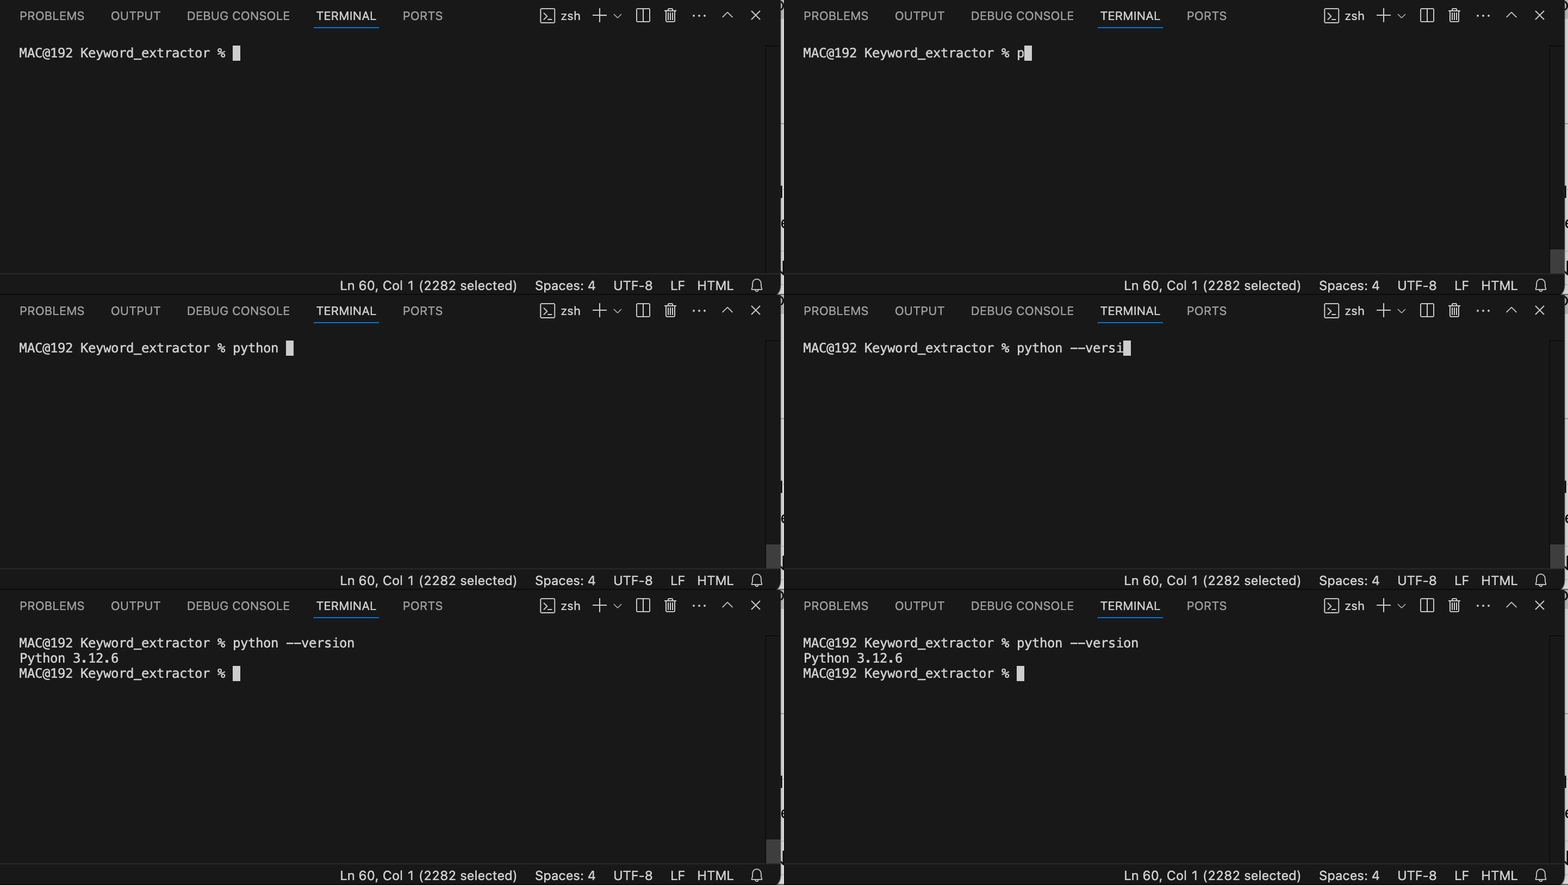
First, you need to ensure Python is installed on your system. Use the terminal to check if it is already installed by running the following command on your terminal.
python --version
If you see a version number just pops up, congrats, you’re good to go. If it’s not installed, don’t panic, you can grab it from python.org and download it on your system. I’ll wait. Got it? Cool.

Now, let’s get a few more things sorted. Ensure that you have access to the following items:
- Visual Studio or VSCode (or any editor of your choice)
- Terminal or Command prompt
Setup a Flask project
Have you ever heard of Flask? No? Don’t worry, let me explain. Flask is a web framework for Python, where we can build simple web applications. Imagine you’re building a resort. Python is your toolbox containing all the fancy tools, but you need a structure to build on top of it, right? That’s where the magic of Flask comes in, its like a structure that helps us to build a simple house, in our case a small app quickly. Basically Flask is a web framework that supports us when we just want to get things done without a headache of external dependencies. Let’s gather all our required tools by installing the Python and Flask.
Let’s first create our project directory to store all of our files. Open the terminal and use the following commands to create and enter into a working directory:
mkdir sentiment_analysis
cd sentiment_analysis
Now let’s install Flask and OpenAI, the backbone of our system. Run the following commands inside your terminal.
pip install Flask openai
Front end essentials
We’ll be using HTML to develop the structure of our tool’s frontend, CSS for staying the frontend, and Javascript to add some interactivity. I’ll walk you through all of it later in this article.
Initialize the OpenAI API
Now let’s bring the brain of our system—The OpenAI API. To use OpenAI’s API, we’ll need to sign up over the OpenAl platform and create an account. After signing in, move towards the API keys section and generate a new key. Keep this key safe because it’s your golden ticket to access the GPT models.
If you face any difficulty in during the signup and API key generation follow this guide to use OpenAI API to learn more about OpenAI API’s. We also need to ensure our API is not exposed throughout the creation process.
Develop the frontend
Let’s start our frontend development journey with a webpage that allows users to input their comments and get feedback for the sentiments. Create a folder in the project directory named templates and create a file index.html using the following:
mkdir templates
# For MAC users
touch templates/index.html

# For windows users
cd templates
echo. > index.html  # Using command prompt
New-Item -Path index.html -ItemType File # Using PowerShell
As the folder is set up and the file is also created let’s start creating our frontend.
HTML Layout
Now paste the following code inside the index.html file.
<!DOCTYPE html>
<html lang="en">
<head>
    <meta charset="UTF-8">
    <meta name="viewport" content="width=device-width, initial-scale=1.0">
    <title>Sentiment Analysis Tool</title>
    <link rel="stylesheet" href="{{ url_for('static', filename='styles.css') }}">
    <script src="<https://cdn.jsdelivr.net/npm/chart.js>"></script>
</head>
<body>
    <div class="container">
        <h1>Sentiment Analysis Tool</h1>
        <textarea id="textInput" placeholder="Enter comments separated by new lines..." required></textarea>
        <button id="analyzeButton">Analyze Sentiment</button>
        <h2 id="result"></h2>
        <canvas id="sentimentChart" width="400" height="200"></canvas>
    </div>
    <script src="{{ url_for('static', filename='script.js') }}"></script>
</body>
</html>
This code acts as a skeleton for our sentiment analysis tool. It provides us with an area where users will enter the comments, a button to trigger sentiment analysis, and also a section to display the results. Let’s try to add some life to it by adding colors in the next section.
CSS Styling
Let’s style our boring webpage by playing with some colors around it. First, let’s create a folder in the project directory named as static, and inside it create a file called styles.css using the following:
mkdir static
# For MAC users
touch static/styles.css

# For windows users
cd static
echo. > styles.css  # Using command prompt
New-Item -Path styles.css -ItemType File # Using PowerShell
Once styles.css file is created paste the following code inside it:
/* Basic reset */
* {
    margin: 0;
    padding: 0;
    box-sizing: border-box;
}

body {
    font-family: 'Arial', sans-serif;
    background-color: #f0f0f0;
    display: flex;
    justify-content: center;
    align-items: center;
    min-height: 100vh;
}

.container {
    background-color: white;
    padding: 20px;
    width: 90%;
    max-width: 600px;
    text-align: center;
    border-radius: 8px;
    box-shadow: 0 2px 10px rgba(0, 0, 0, 0.1);
}

textarea {
    width: 100%;
    height: 150px;
    margin-bottom: 15px;
    padding: 10px;
    font-size: 16px;
}

button {
    background-color: #4CAF50;
    color: white;
    padding: 10px 20px;
    border: none;
    cursor: pointer;
}

button:hover {
    background-color: #45a049;
}

#result {
    margin-top: 20px;
    font-size: 18px;
}

canvas {
    margin-top: 20px;
    width: 100%;
}
This code provides a new modern and clean look. We have used containers to center align the overall design and use some padding to ensure our interface is user-friendly.
The Javascript
With that, now it’s time to add some connections that allow our front end to connect with the backend, right? That’s where script.js comes into play. The javascript receives the comments, forwards them to Flask, and then displays the results. Let’s create a file called script.js using the following:
# For MAC users
touch static/script.js

# For windows users
cd static
echo. > script.js  # Using command prompt
New-Item -Path script.js -ItemType File # Using PowerShell
Once script.js file is created paste the following code inside it:
document.getElementById('analyzeButton').addEventListener('click', function() {
    const textInput = document.getElementById('textInput').value;
    const comments = textInput.split('\\n').filter(comment => comment.trim() !== '');

    fetch('/analyze', {
        method: 'POST',
        headers: {
            'Content-Type': 'application/json'
        },
        body: JSON.stringify({ comments: comments })
    })
    .then(response => response.json())
    .then(data => {
        const resultElement = document.getElementById('result');
        const chartData = { positive: 0, negative: 0, neutral: 0 };

        // Process and display the results
        resultElement.innerHTML = ''; // Clear previous results
        data.forEach(item => {
            resultElement.innerHTML += `<p>${item.comment} - ${item.sentiment}</p>`;
            // Count sentiments for the chart
            if (item.sentiment.includes("positive")) {
                chartData.positive++;
            } else if (item.sentiment.includes("negative")) {
                chartData.negative++;
            } else {
                chartData.neutral++;
            }
        });

        // Update the chart (if using Chart.js)
        updateChart(chartData);
    })
    .catch(error => console.error('Error:', error));
});

function updateChart(data) {
    const ctx = document.getElementById('sentimentChart').getContext('2d');
    const chart = new Chart(ctx, {
        type: 'bar',
        data: {
            labels: ['Positive', 'Negative', 'Neutral'],
            datasets: [{
                label: 'Sentiment Count',
                data: [data.positive, data.negative, data.neutral],
                backgroundColor: ['#4CAF50', '#F44336', '#FFEB3B']
            }]
        },
        options: {
            scales: {
                y: {
                    beginAtZero: true
                }
            }
        }
    });
}
This javascript file will collect all the comments and with the click of a button, it will send it to the flask backend and display the sentiment results over the screen.
Creation of Backend
Alright, let’s get into setting up the fun part, the backend! This is where the actual magic of sentiment analysis happens. We’ll utilize Flask to create a backend server and handle the post requests from the front end. Create an app.py file in the project directory as follows:
# For MAC users
touch app.py

# For windows users
echo. > app.py  # Using command prompt
New-Item -Path app.py -ItemType File # Using PowerShell
Once app.py file is created paste the following code inside it:
from flask import Flask, request, jsonify, render_template
import openai

app = Flask(__name__)

# Set your OpenAI API key
openai.api_key = 'Enter-your-API-key here'

@app.route('/')
def home():
    return render_template('index.html')

@app.route('/analyze', methods=['POST'])
def analyze_sentiment():
    data = request.json
    comments = data.get('comments')

    results = []
    for text in comments:
        response = openai.ChatCompletion.create(
            model="gpt-3.5-turbo",
            messages=[{"role": "user", "content": f"Analyze the sentiment of this text: '{text}'"}]
        )
        sentiment = response.choices[0].message['content']
        results.append({'comment': text, 'sentiment': sentiment})

    return jsonify(results)

if __name__ == '__main__':
    app.run(debug=True)
In the above code, the Flask server serves the HTML file and uses OpenAI API to process each comment. The OpenAI’s model analyzes the sentiment and returns its analysis in simple terms as positive, negative, or neutral.
Now that we’ve set up the front end and back end of the sentiment analysis tool, it’s time to test it out by running our applications in the upcoming section.
Running our application
Now it’s time to run our application and utilize our sentiment analysis tool in action.
Start our Flask development server by running the following command:
python app.py
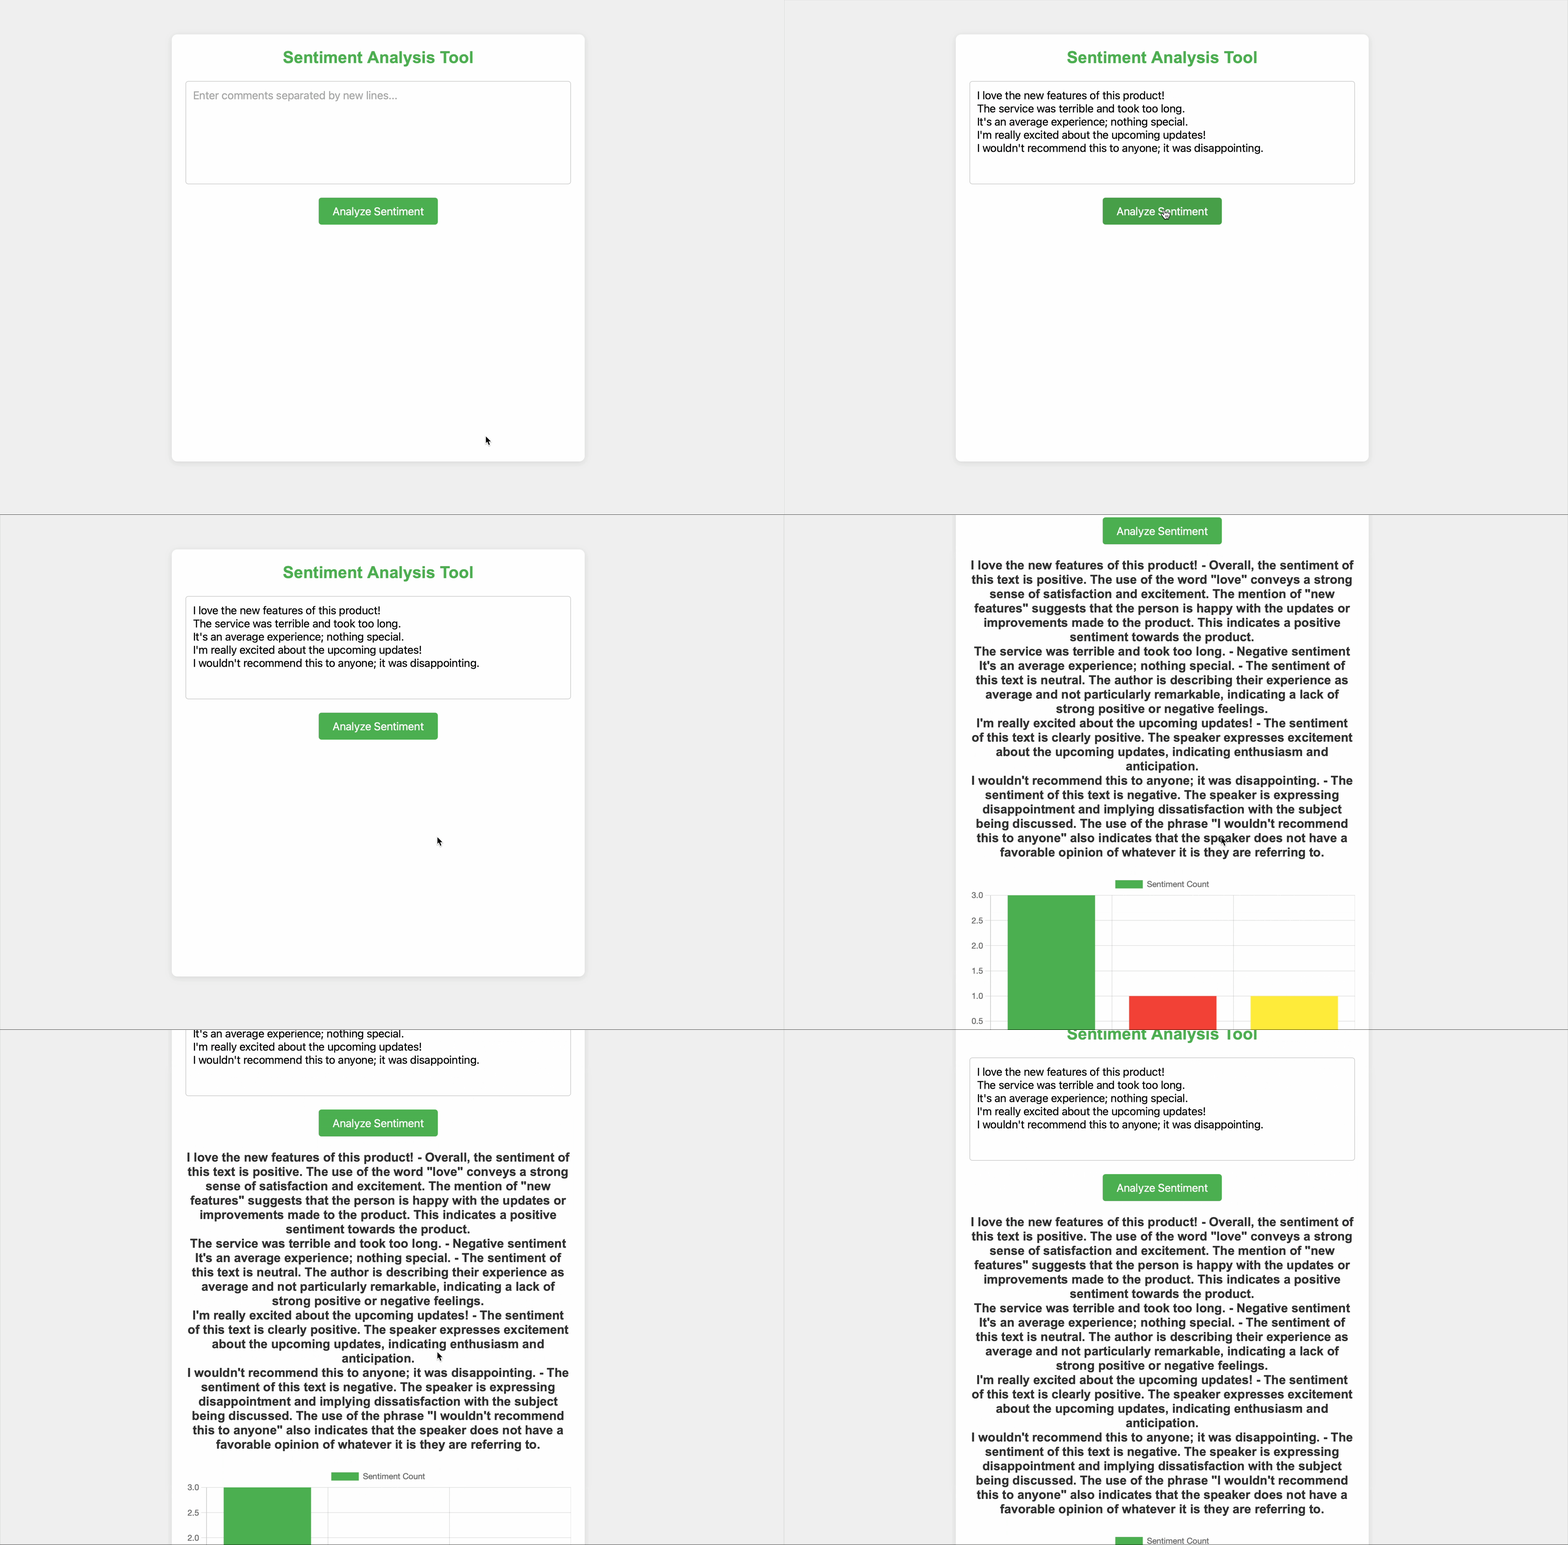
It will start the server and launch the app at http://127.0.0.1:5000/. You’ll see the interface of our sentiment analysis tool. Enter all the comments and analysis will be performed in no time, thanks to the power of OpenAI!

Not only do we get instant feedback, but we also get a chart visualizing how many comments fall under each category. Pretty neat, right?
Congratulations! You have just built a sentiment analysis tool. Feel free to experiment with it or add more functionality according to your specific requirements. You can use OpenAI to analyze comments in multiple languages or provide a dashboard to show different trends over time. Building this sentiment analysis tool is a landmark, isn’t it?
What’s next on your learning journey? Are you going to expand this tool or planning to try something new, keep on experimenting as every project helps you to grow as a builder!
Explore more on Metaschool
If you found building an AI-powered code review assistant helpful, you might be interested in exploring more hands-on projects to expand your skills. Check out our other courses on Metaschool:
- Build an AI Dating Coach Using NextJS and OpenAI: Ever thought about creating an app that provides personalized dating advice? This course guides you through building a dating coach app that uses OpenAI’s API and NextJS to deliver insightful advice to users.
- Build a YeBot with OpenAI API: Learn how to create a sophisticated chatbot using OpenAI’s powerful API, perfect for enhancing your understanding of AI-driven applications.
- Build a Code Translator Using NextJS and OpenAI API: Dive into building a code translation tool using NextJS and OpenAI, a great way to apply your knowledge practically and innovatively.
Explore these courses and more to continue your journey in AI on the Metaschool platform
FAQs
What tools and technologies are required to build a sentiment analysis tool?
To build a sentiment analysis tool, you’ll need a combination of backend and frontend technologies. The core requirements include:
Backend: A web framework like Flask (Python) to handle API requests.
API: OpenAI’s GPT model for sentiment analysis.
Frontend: HTML, CSS, JavaScript, and libraries like Chart.js for data visualization.
Can I customize the sentiment analysis model to handle specific types of data?
Yes, with proper prompt engineering or by fine-tuning an AI model, you can train it to understand specific types of data, such as customer reviews, social media posts, or product feedback. By providing examples and context in the API prompt, you can tailor the results to your needs without deep AI model training.
What are the limitations of AI-based sentiment analysis?
AI-based sentiment analysis is powerful but has limitations. It may struggle with sarcasm, nuanced emotions, or domain-specific language unless trained on specialized datasets. Additionally, the accuracy may vary depending on the quality and length of the input text. Fine-tuning or prompt engineering can help improve accuracy in some cases.
